
My Android project template
Have you ever experienced something like this:
- Have a great idea for a weekend project
- Create a new repository
- Setup a proper CI to build your project
- Setup a code formatter to enforce code-style
- Start reading articles about
[tool name here]… - Weekend is over 😅
- Repeat
That’s how a lot of side-projects of mine died in the past.
I love developer-tools such as CIs and static-analysis tools. They’re crucial to deliver good quality code, and I can’t imagine working without them. They’re generally the first thing I set up before starting a new project.
Unfortunately, setting up such tools can be time-consuming, especially if you’re not familiar with a specific tool and how to configure it.
That’s why throughout the years I crafted my own project templates. They help me kick off a project if I have a new idea in mind, without having to spend time configuring everything from scratch.
Recently I’ve spent some time polishing them and open-sourcing some of them. They’re now available for everyone to use with Github templates with just one click.
Here you can find my Android App/Library template: cortinico/kotlin-android-template
In this blog-post, I will walk you through the steps I do before starting an Android project and that you can find already applied in the linked template.
1. Format: ktlint
The clear choice I made in this template is to have it as a 100% Kotlin template. I believe that in 2020 is safe to assume that you can start your new Android project with Kotlin only.
I generally don’t start writing code without a good formatter to support me. Having several comments on your pull-requests about where to place parenthesis or extra white-spaces can be pretty annoying. A formatter can help you ship beautified code and avoid useless discussions.
For Kotlin my preferred formatter is ktlint.
I use the ktlint-gradle plugin to integrate it into my build. With that, running:
./gradlew ktlintFormat
will reformat the entire codebase.
Ktlint-gradle comes with other tasks that can help speed-up developer’s productivity with IntelliJ integration and pre-commit hooks:
# Will update IntelliJ/AndroidStudio reformat rules to
# match the ktlint style.
./gradlew ktlintApplyToIdea

# Will set up a pre-commit hook that will run
# reformat the code before a git commit.
./gradlew addKtlintFormatGitPreCommitHook
If you happen to use Gradle Kotlin DSL, ktlint will conveniently reformat also your .gradle.kts file.
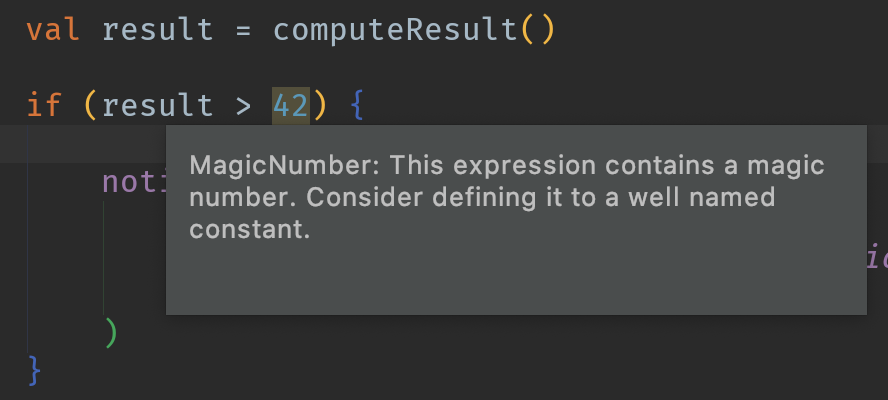
2. Analyze: detekt & lint
Other than beautified, we want our code to be bug-free.
That’s where static analyzers can help spot bugs before the code goes to production. I always configure those two static analyzers on my projects:
- (Android) Lint: A language agnostic analyzer that will help you spot Android-specific bugs (e.g., unused resources or hard-coded text).
- Detekt: A Kotlin specific analyzer that can help you find potential errors or anti-patterns in your Kotlin code.
Lint is available out of the box directly inside Android Studio.
Detekt is instead a command-line tool and can be included in the build with a Gradle plugin.
Once set up, invoking:
./gradlew detekt
is enough to run the static analyzer on the whole codebase.
I personally find useful also the detekt IntelliJ plugin. It will run the detekt inspection directly inside Android Studio without having to run an extra task.
3. Manage dependencies: buildSrc
I prefer to use the Gradle Kotlin DSL to write my build files. It comes with nice features such as auto-completion and semantic editing.
To manage dependencies I use the buildSrc included build. This allows organizing libraries and versions with a Dependencies.kt file such as:
object Versions {
    const val APPCOMPAT = "1.1.0"
    const val CORE_KTX = "1.2.0"
    const val JUNIT = "4.13"
}
object SupportLibs {
    const val ANDROIDX_APPCOMPAT = "androidx.appcompat:appcompat:${Versions.APPCOMPAT}"
    const val ANDROIDX_CORE_KTX = "androidx.core:core-ktx:${Versions.CORE_KTX}"
}
object TestingLib {
    const val JUNIT = "junit:junit:${Versions.JUNIT}"
}
Those versions and coordinates are available to every build script in the project. Declaring a dependency is as easy as:
Moreover, I’m using the Gradle Plugin DSL to apply Gradle plugins instead of the old apply: statement.
Setting up a new module is a matter of just:
plugins {
    id("com.android.library")
    kotlin("android")
}
The buildscript {} block is not needed anymore. Plugin versions are defined in the top-level build.gradle.kts file, while repositories are declared in the settings.gradle.kts file.
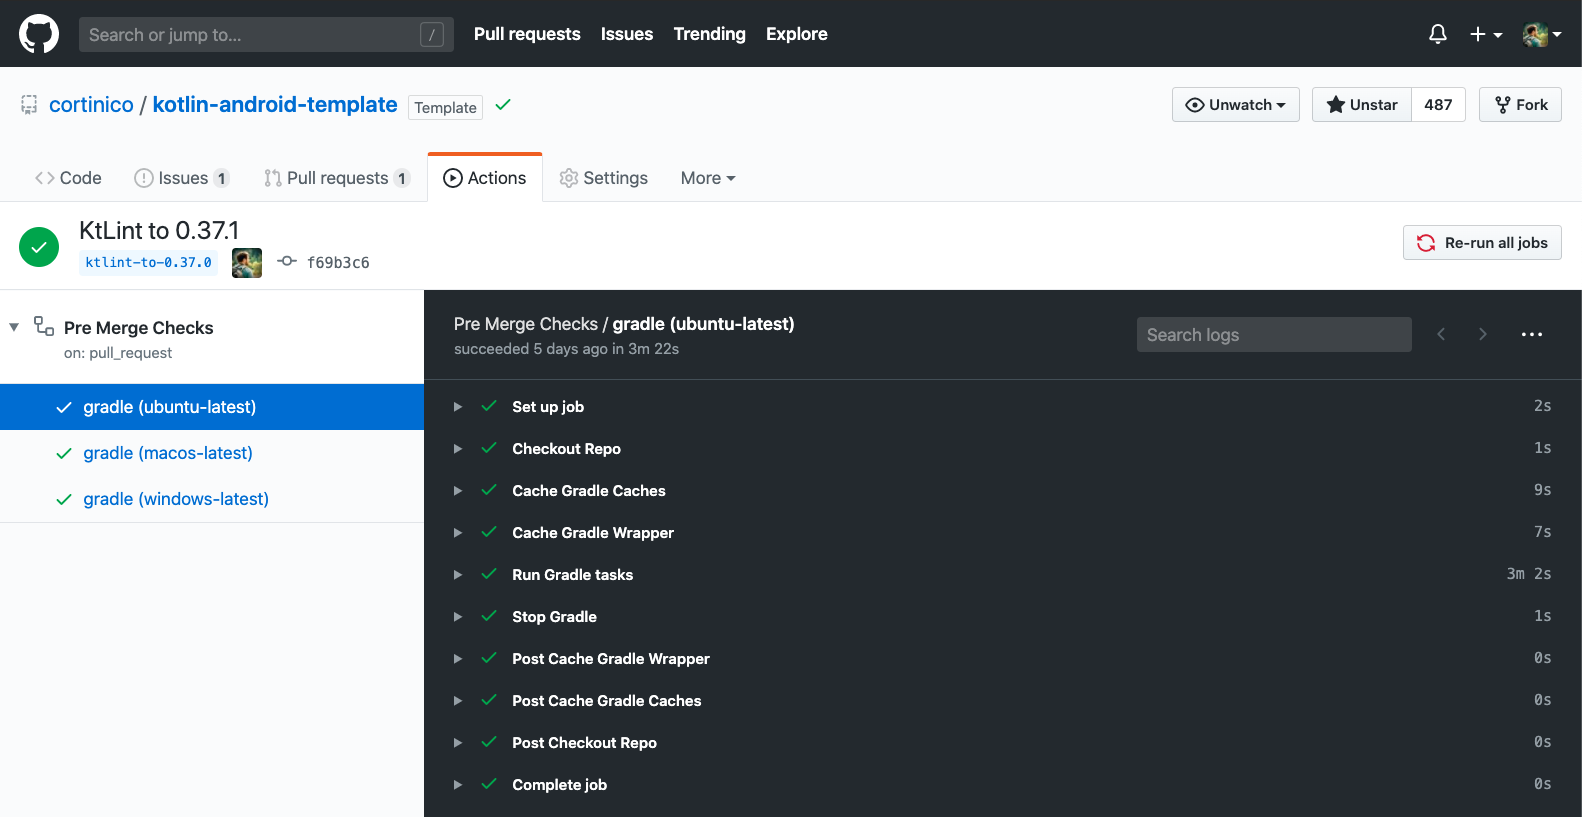
4. Build: Github Actions
To build and test my project, I always set up a continuous integration environment. This allows running tests in isolation and ensuring consistent code formatting/static analysis on every commit.
I’ve tried several CI services in the last years, but recently I’ve migrated a lot of my projects to Github Actions.
In the template you can find two Github Actions workflows:
- pre-merge To build, test, run detekt & ktlint on all the modules of the project.
- gradle-wrapper-validation To validate the hash of the Gradle wrapper.
Those workflows will run automatically for every new Pull Request and for every push.
Github Actions integrates well with Github templates: when you create a new repo from my template, you will have a CI setup already running, and you don’t need to set up extra services or create other accounts.
5. Conclusion: Maintain a template
Whenever I start a new project, I make sure to spend some time to update my templates to the latest market standards and tooling versions. I personally found project templates useful in several occasions:
- When kicking off a new project, they get you started in some seconds and let you prototype fast your idea.
- When submitting bugreports to open-source projects, they let you create an empty project to easily showcase how to reproduce a failure scenario.
- When working on other projects, I often come back to my template to check how I configured a specific tool. They serve as documentation for my preferred setup.
I hope you found my template useful, and you get inspired to create your own. 💪
If you want to talk more about this, you can find me as @cortinico on Twitter .
Leave a comment